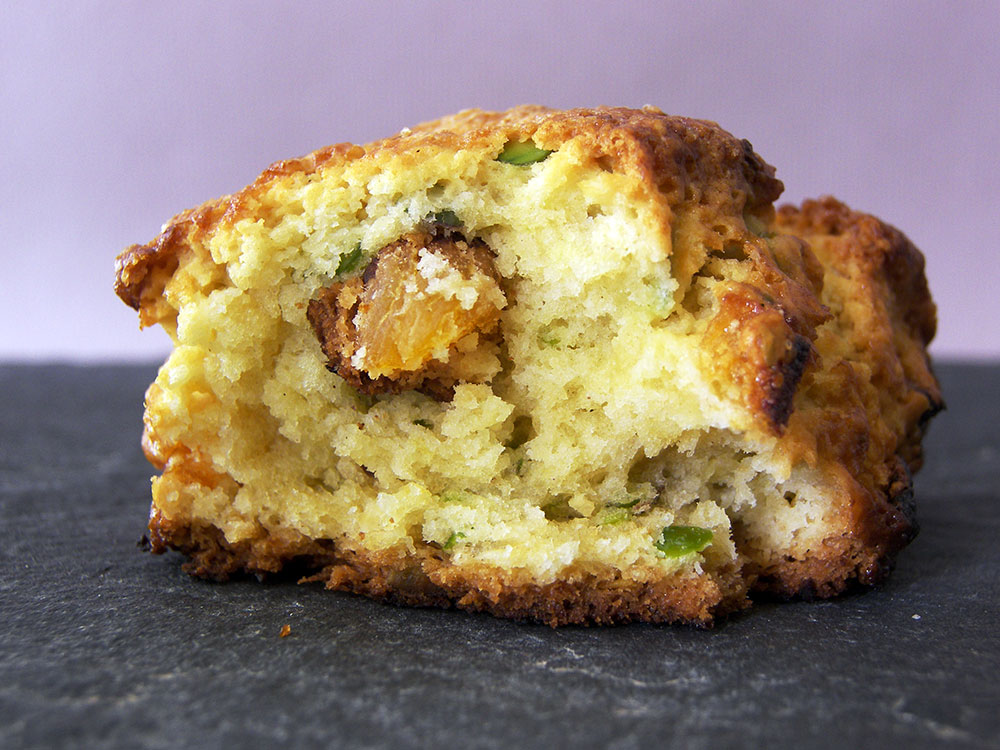
Tender, sweet, rich and buttery. These four words describe these scones perfectly. Preparation is a breeze. Can not think of a better accompaniment to an afternoon tea.

How to Make the Perfect Scone. Quick tips:
- First of all, before adding butter or any kind of liquid into your flour mixture, always toss your dried fruit and nuts with the flour, so that they will be evenly distributed among wedges.
- Chill your butter. The butter should be cold and firm, so that when you cut it into the dry ingredients it forms pea-sized pieces. This will make the scones light and tender. I always cut the butter into small cubes and keep it in the freezer for 15 minutes before adding it in. I even chill the flour mixture together with the bowl (in the refrigerator).
- Minimal handling is key! Scone batter should be mixed just until the ingredients hold together and the dry ingredients are incorporated. Kneading converts the protein to gluten. Do not over-knead or your scones will be tough and heavy.
- For flaky, layered scones, use a folding technique. Gather the dough into a ball, fold it in half and in half again and again.
- Do not pat the cut edges of the scones. Patting with your fingers melds the edges and the scone will not rise as nicely or have a flaky, layered structure.
- Also, keep an eye on the scones when they are baking. Do not over-bake like I did! Over-baking for even a minute or two will dry your scones out. As soon as the edges begin to turn brown, remove them from the oven. Place the scones on a wire rack immediately (the hot pan will continue to dry the scones).

DRIED APRICOT AND PISTACHIO SCONE RECIPE
(recipe adapted from Fine Cooking’s Holiday Baking special issue Winter 2004)
Ingredients
- 2 cups all-purpose flour
- 1/3 cup granulated sugar
- 2 teaspoons baking powder
- 1/2 teaspoon table salt
- 1 cup of dried apricots, diced
- 1/4 cup of pistachios, roughly chopped
- 6 tablespoons cold unsalted butter, cut into cubes
- 3/4 cup heavy cream
- 2 large egg yolks, lights beaten
For finishing:
- 1 large egg lightly beaten with 1 tablespoon milk for glazing
- 1 tbsp granulated sugar for sprinkling
Method
- Position an oven rack in the lower third of the oven and heat the oven to 400 F (205 C). Line a heavy baking sheet with parchment. In a large bowl, whisk together the flour, sugar, baking powder and salt.
- Add the dried apricots and pistachios, tossing until evenly distributed and coated with flour (this allows the dried fruit and nuts to be evenly distributed among each wedge). Cut in the butter with a pastry blender or two table knives until the largest pieces of butter are about the size of peas.
- In a small bowl, stir the cream and egg yolks just to blend. Add this all at once to the flour mixture. Stir with a fork to begin combining the wet and dry ingredients and then use your hands to gently knead the mixture together until all the dry ingredients are absorbed into the dough and it can be gathered into a moist, shaggy ball.
- Do not overknead: This dough is sticky but benefits from minimal handling. Set the rough ball in the center of the prepared baking sheet and pat it gently into a round about 1 inch thick and 7 inches in diameter. Don’t be tempted to make the round any flatter.
- With a sharp knife or pastry scraper, cut the round into eight wedges; separate the wedges. Brush the scones with the egg-milk glaze and sprinkle (liberally) with the sugar. Bake until the scones are deep golden and a toothpick inserted into the center of a wedge comes out clean, 18 to 20 minutes. Slide the parchment onto a rack and let cool for 10-15 minutes.
- Best served fresh, these scones will keep for up to a month, wrapped well and frozen. Thaw at room temperature and then warm in a 325 F oven.


Never made scones before. Once I eat through my rhubarb bounty, I’ll be so making scones. Looks gorgeous, Cenk (especially those green speckles of pistachios)!!
I’ve made scones only once and they were good (although I don’t have a comparison basis). 🙂
Yours look delicious, I love the flavors you chose, Cenk.
ok i am practically bowing down to you right now.What a beautiful step by step guide to making the most delicious looking scones.I love your tip on coating the fruits with flour, and i love that hand whisk kind of thing to bring in the flour and butter together.I’ve not seen it at my baking shop.
Thank you Kate 🙂 That pastry blender works great. I can not imagine doing this with two knives.
Ah, these are gorgeous. I love pistachio.This blog is such a dream.Pistachio and apricots.
Your scones are very yummy looking! This association of ingredients is very interesting…
Valentina, Rosa – Thank you. These two ingredients turned out to be a good match.
I can’t believe I just found out your site. Gorgeous, brilliant! I am licking my screen at every turn!
🙂 Thank you Tartelette. That is one of the nicest comments I have received so far.
Merhaba Cenk,
Kesinlikle denenecekler listesine girecek bir tarif. Ama kayisilar konusunda bazi endiselerim var, parlak sari-turuncu renginde olanlar sulfurle kurutulmus olanlar diyorlar. Ben de uzun zamandir “gunkurusu” denen, daha kahverengi ama tadı daha karamel gibi olanlari kullaniyorum. Belki bu tarifte de guzel olabilir..
Kolay gelsin. Aysegul.
Haklisin Aysegul. Kahverengi olanlar organik oldugu icin daha saglikli. Ben yaptigim seylerin ayni zamanda goze de hitap etmesi gerektigini dusundugum icin bu tarifte bilerek turuncu renkte olanlari kullandim. Kotu bir bahane olarak gelebilir ama ne yapayim fotografta daha guzel duruyorlar 🙂
I’m also a newbie, following a link from Cocoandme, and this is what the pistachios in my cupboard have been waiting for. I was wondering why they were unwilling to commit to any other recipe!
Very much looking forward to future posts.
Scones remember old days. Days when I was living happily in Boston and having cranberry scones at the Carberries. Such a long time ago. And the days in Bodrum, when our British friend used to make scones for us…
These scones look so delicious!
Eline sağlık Cenk! Bu tarifini yeni gordum.
Acaba tahinli scone nasıl olur dersin?? Hic denedin mi?
D.
These look fantastic! Can you tell me if you are able to freeze these before baking and then bake when needed?
Alex – I’ve never done that, but why not? The point with quick breads is (since they come together in 10-15 minutes) you prepare them right before baking.
Beautiful site and delicious! I added nutmeg and cinnamon as well. Your blog inspires me to bake.