It is rare that I manage to publish a recipe for a fruit dessert before the fruit’s season is over. Almost always, by the time I’m done with the recipe testing, the photos, and the headnote, the season is long gone. I stash away everything in a folder filled with incomplete posts and when the time comes the following year, I either don’t like the photos as much as I used to or succumb to the urge to develop the recipe further. Then I become overwhelmed and move on to another project.
This strawberry tart is an exception, because I had a great starting point: The white chocolate and yogurt filling from the Raspberry, White Chocolate, and Yogurt Tart from my upcoming book, The Artful Baker.
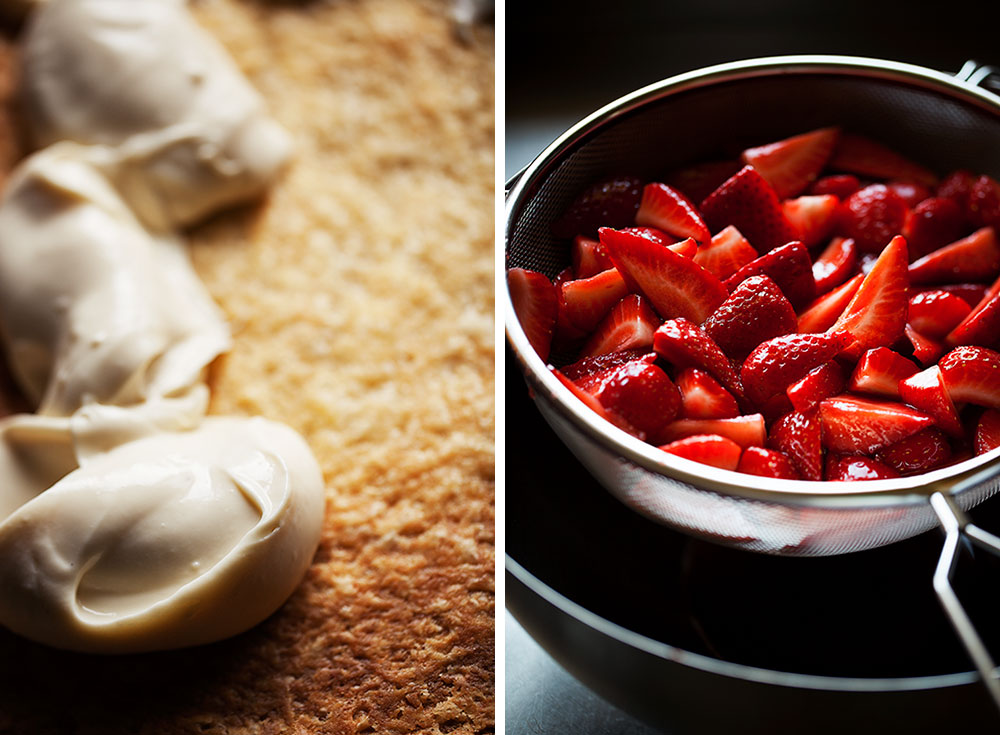
Fold tangy strained yogurt into a silky white chocolate ganache, and you’ll have a filling that rivals any pastry cream in ten minutes flat.
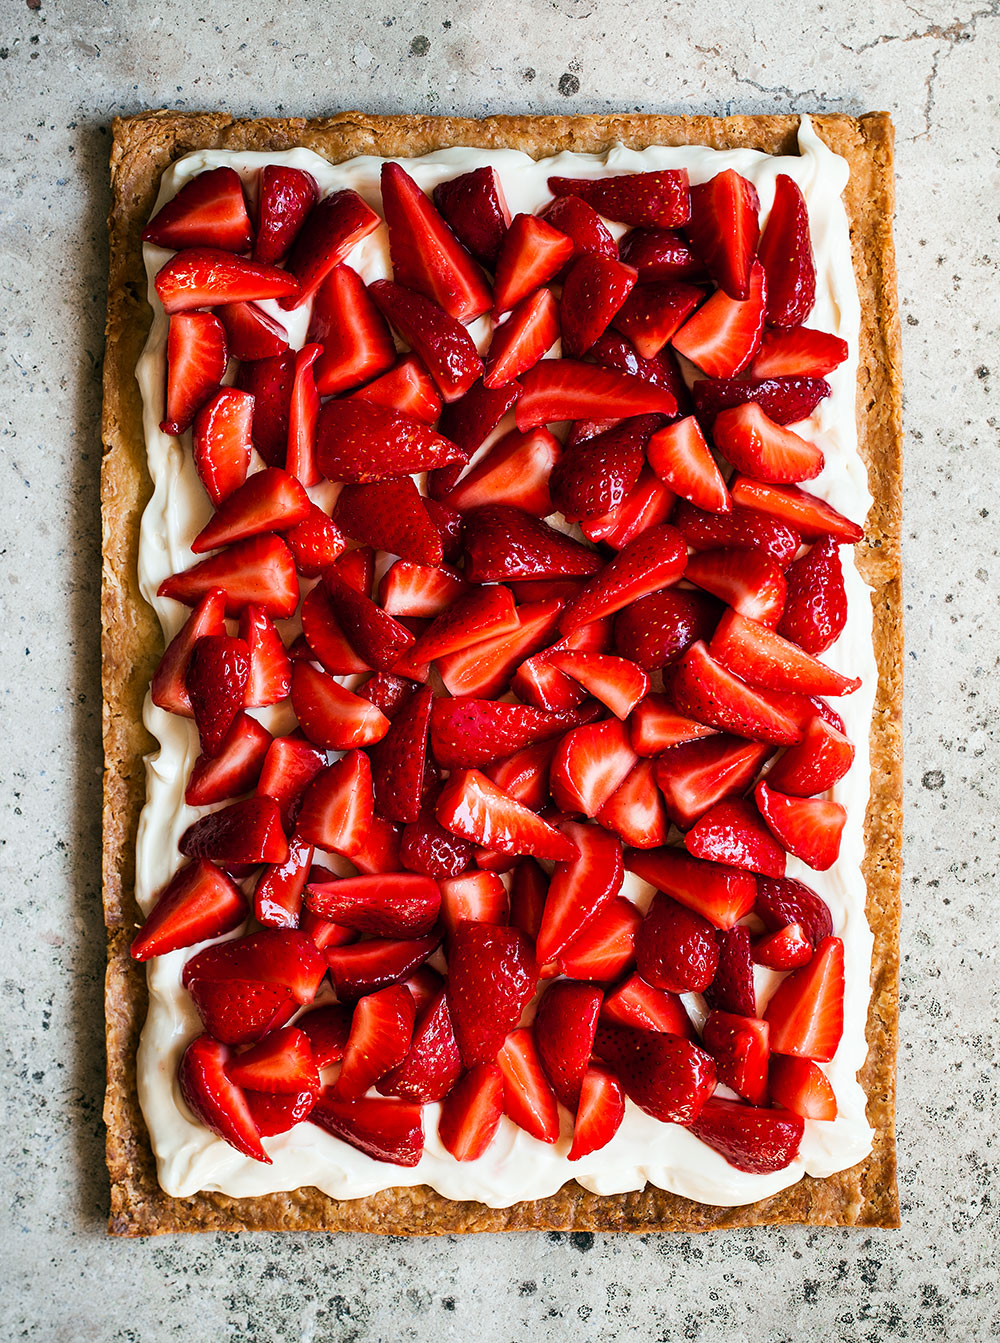
The tart in the book has a sweet short crust, so raspberries are ideal to balance both the sweet filling and the crust. Strawberries are much sweeter than raspberries and will become even sweeter once they are macerated in sugar, so a few things had to change. I replaced the short crust with a flaky pie dough (also from the book) and reduced the amounts of sugar and white chocolate in the filling. The increased ratio of strained yogurt and the lemon zest I added for zing made the filling tangier and brighter—just what the syrupy strawberry slices needed.
Macerating the berries intensifies their flavor, but it also makes the assembly time sensitive: macerate them too long and they will become limp. The crust and filling may be prepared ahead of time, but macerate the berries about 30 minutes before assembly, and put everything together at the last minute for the best texture. For the same reason, the assembled tart doesn’t last long, so make sure you serve it to a crowd.
The filling pairs beautifully with apricots and peaches as well (maybe with a handful of blueberries or blackberries scattered between the slices). If you take that route, you can skip the macerating step and the tart will last much longer.
STRAWBERRY, WHITE CHOCOLATE, AND YOGURT TART
Serves 12
Flaky Pie Dough
Makes 17 ounces (480 grams)
- 10 tablespoons plus 2 teaspoons (5.3 ounces; 150 grams) cold unsalted butter
- 1/3 cup (80 grams) ice water
- 1 teaspoon (5 grams) cider vinegar
- 1+2/3 cups (233 grams) all-purpose flour
- 1 tablespoon (13 grams) granulated sugar
- 1/2 teaspoon (4 grams) fine sea salt
White Chocolate & Yogurt Filling
Makes 1.22 pounds (555 grams)
- 2 tablespoons (30 grams) water, at room temperature
- 2 teaspoons (8 grams) powdered gelatin
- 1 lemon
- 2 tablespoons (25 grams) granulated sugar
- 1/2 cup (120 grams) heavy cream
- 5.6 ounces (160 grams) white chocolate, finely chopped
- 1 cup (230 grams) plain full-fat strained (Greek-style) yogurt
Macerated Strawberries
- 6+1/4 cups (1.65 pounds; 750 grams) fresh strawberries, hulled
- 1/4 cup (50 grams) granulated sugar
Note: Macerating the berries intensifies their flavor, but it also makes the assembly time sensitive: macerate them too long and they will become limp. The crust and filling may be prepared ahead of time, but macerate the berries shortly before assembly, and put everything together at the last minute for the best texture.
- To make the dough, cut the butter into 1-inch (2.5-cm) pieces and freeze for 20 minutes.
- In a small pitcher, stir together the water and vinegar and refrigerate until needed.
- In the bowl of a food processor fitted with a metal blade, process the flour, sugar, and salt until blended. Add the butter pieces, pulsing until they are the size of hazelnuts. While pulsing, gradually drizzle in all but 2 tablespoons (30 grams) of the cold water-vinegar mixture through the feed tube until the dough resembles coarse meal. To test it, squeeze a small piece of the dough in the palm of your hand. If it mostly sticks together, you have added enough liquid. If not, gradually pulse in the remaining 2 tablespoons (30 grams) of water-vinegar until the dough holds together when squeezed.
- Empty the dough into a medium bowl and gently press it into a ball with your hands. Wrap the dough with plastic wrap, flatten it into a 4-by-6-inch (10-by-15-cm) rectangle, and refrigerate for at least 4 hours. (The dough will keep, double-wrapped with plastic wrap, in the refrigerator for up to 3 days or in the freezer for up to 2 months. Thaw overnight in the refrigerator before using.)
- Roll out the dough between two large sheets of parchment paper into a rough 9 3/4-by-13 3/4-inch (25-by-35-cm) rectangle, occasionally flipping the dough with the parchment, then lifting and smoothing the parchment to avoid creases. If the dough becomes soft and sticky as you roll, transfer the dough and parchment to a baking sheet and freeze for 5 to 10 minutes before continuing.
- Peel off the top parchment and trim the edges with a paring knife to form a neat 9 1/2-by-13 3/8 inch (24-by-34 cm) rectangle. Transfer the dough and parchment to a baking sheet, cover with the top parchment sheet, and refrigerate for 30 minutes. Gather the scraps into a small ball, wrap with plastic wrap, and refrigerate for patching the crust later if needed.
- To bake the dough, set a rack in the middle of the oven and preheat the oven to 375°F (190°C).
- Peel away the top parchment sheet from the chilled dough. Lay the parchment paper back on top. Cut a sheet of aluminum foil twice the size of the dough, fold it in half and place it over the parchment. While pressing down on the center with your palm, pull up the sides of the foil about 1 inch (2.5 cm) to create a raised rim. Fill the foil with pie weights or dried beans.
- Bake the crust for 25 minutes. Lift out the parchment, foil, and pie weights. Return the crust to the oven and bake until the center is golden and the edges are golden brown, about 15 minutes.
- Slide the crust onto a wire rack to cool completely. If you won’t be serving the tart until later in the day, once cooled, slide the crust onto a serving plate, cover with plastic wrap, and keep at room temperature until assembly.
- To make the filling, pour the water into a small bowl, sprinkle the gelatin evenly over the top, and let stand until the gelatin blooms and absorbs the water, about 5 minutes.
- Using a fine-tooth rasp grater, grate the zest of the lemon (avoiding the bitter white pith) directly into a medium saucepan. Add the sugar and use your fingertips to rub the zest into the sugar. Add the cream, set the saucepan over medium-hight heat, and bring the mixture to just below a boil, stirring frequently. Reduce the heat to low and add the white chocolate and bloomed gelatin. Stir gently with a silicone spatula until the chocolate melts and the gelatin dissolves, about 3 minutes. Take the pan off the heat, add the yogurt, and whisk until smooth.
- Scrape the filling into a medium bowl, cover with plastic wrap, and refrigerate until set, about 3 hours. (The filling will keep in the refrigerator for up to 3 days. Whish until smooth before using.)
- About 30 minutes before serving the tart, macerate the strawberries. Cut the berries lengthwise (top to bottom) into quarters. In a large bowl, toss the berries with the sugar and let stand until the berries release their juices and the sugar dissolves, about 20 minutes, occasionally stirring them gently with a silicone spatula. Scrape the berries and their juices into a mesh strainer set over a large bowl and let drain for 10 minutes, gently shaking the strainer to help drain the juices.
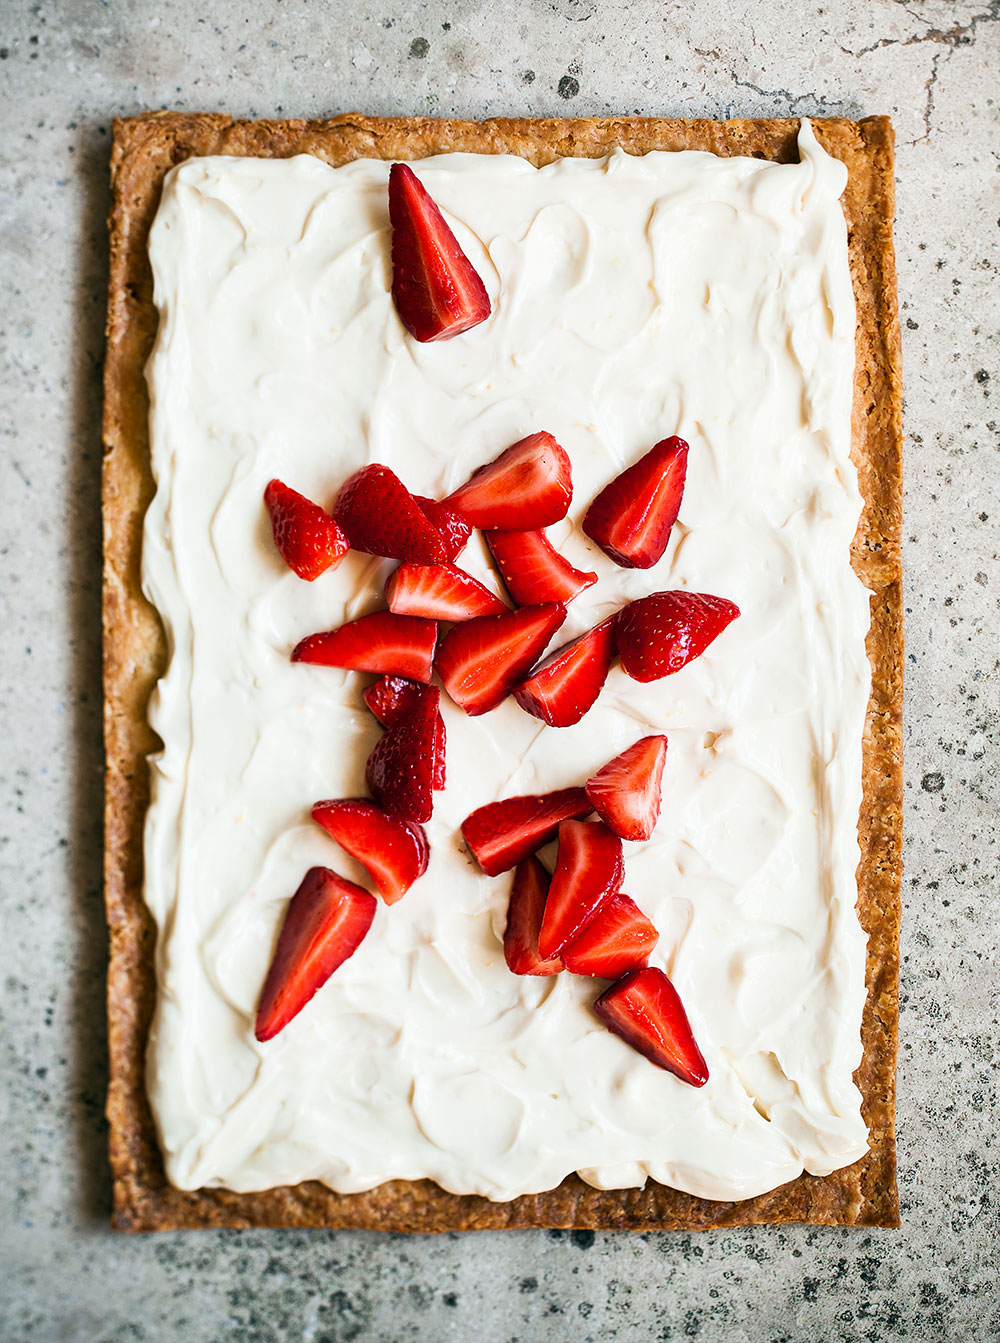
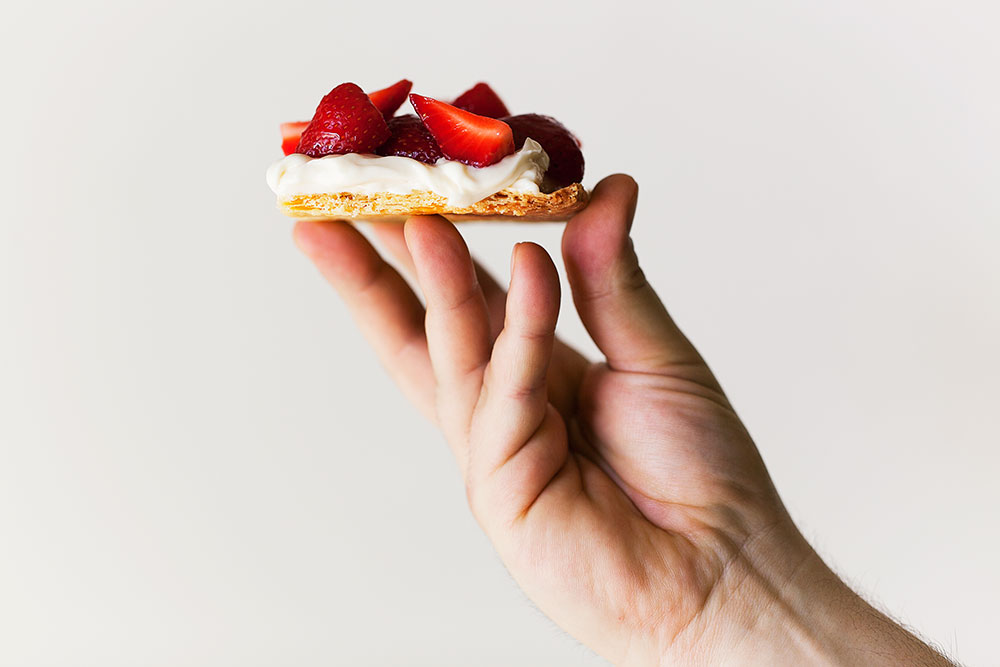
- Shortly before serving, assemble the tart. Slide the baked crust onto a serving plate. Whisk the filling until smooth, scrape it into the center of the crust and spread evenly with a small offset spatula, leaving a 1/2-inch (1.3-cm) border around the edges. Arrange the berries over the filling and serve immediately.


You are simply amazing. What a labour of love. This is going to be a masterpiece. I’ve followed you over the years, and gave to say you are iconic!
Deeba Rajpal – Thank you so much!
Mihai Petrisor – That’s a lot for your kind words 🙂
You are by far, the most amazing food blogger and photographer i have ever seen. I’ve been waiting new recipes for ages, but it was worth it nonetheless.
Seeing the picture, I thought, “finally a recipe I can possibly follow”, after reading the instructions decided to follow my heart 🙂 and put together the berries, a crust and some cream that will resemble your tart.
You and your recipes are such an inspiration! I will make for 4th of July and toss on a few blueberries. But I am going to change it up a bit. Line up as a dessert buffet with a silver platter of individual round baked crusts, maybe star shape, big bowl of white chocoate yogurt filling and a big bowl of the strawberries and blueberries. Then guests can make their own at their leisure and no worries about a soggy crust!
Thank you!!!!!!
Terry Drendel – Thank you for your kind words. Your plan sounds great! Hope you enjoy.
Bravo–it looks and sounds great and bless you for giving all the weights and in grams!!! your book is going to be a wonderful contribution to our pastry field.
Rose Levy Beranbaum – Thank you, Rose! I learned from the best 🙂
Yogurt! Strawberries! This is healthy!! Impressive, as always.
Do you think I could make this without the gelatin?
Ena – I’m afraid it will be too runny without the gelatin.