I am feeling homesick. It has been 3 years, 5 months and 11 days since I last visited San Francisco. Old tricks run short nowadays. Cruising rentals in the Marina at Craigslist just doesn’t cut it. I am getting bored watching the “Weeping Maidens” and the sandwich shack on the Marina Green. I am constantly on the look out for other peeping opportunities. A recent discovery is a science fiction TV series called “Journeyman”. It is about a San Francisco reporter who travels through time and changes people’s lives. After almost all of his travels, he wakes up somewhere in the Marina – usually at the Palace of Fine Arts. And I go, “Ohhh, that’s my old neighborhood”, “Ahh, that’s the street corner where I made out with…” Anyways, what I really want to say is, I want my 450 square feet studio back! I missed the flower guy across the street with 5 feet long hair and dirty nails. I missed the mini quakes each time the bus turned the corner. And, most of all, I missed my tiny kitchen..
So what do these all have to do with bagels, you ask… The short answer is, I needed a familiar taste to soothe me.
I guess it would be odd to associate bagels with San Francisco, but I do. See, I ate my first bagel in San Francisco. It was at a time when I was feeling homesick – again! Bagels reminded me of a Turkish delicacy called simit, which is pretty much the same concept. Circular dough, hole in the middle, sesame seeds on top… And I was instantly hooked.
A lot has changed since I moved back to Turkey. Bagels are everywhere now. But I just can’t find that familiar taste. Most of them are not chewy enough and they taste more like the store-bought stuff. So yes, long story short, I baked my own bagels and I’m extremely proud.
When I received my copy of Peter Reinhart’s “The Bread Baker’s Apprentice”, there was no question that “Bagels” was the first recipe I was going to try. To tell you the truth, I was a bit scared after I read through the recipe for the first time. It seems like a very challenging recipe, but with Reinhart’s detailed instructions and step by step photos, there is really little room for any mistakes. The dough needs to pass two tests before going into the oven – both to make sure you achieve the best result.
Reinhart suggests that you use high-gluten bread flour in the recipe, but I stuck to all-purpose and everything turned out fine. I have to warn you though – if you are planning to use all-purpose, which has a lower gluten level, get ready to work that dough for a very long time. I didn’t mind at the beginning… I thought my KitchenAid mixer was going to take care of that anyway, but that was not the case. See, the 5-quart type of Kitchen Aid mixer, which I assume is the most commonly owned size among the home bakers, is too small for the size of this dough. The machine had a hard time standing still after the final addition of flour and soon there were nasty smells coming out from the engine. Since I love my KitchenAid mixer very much and it costs 3 times the ones sold in the US, I had no choice but to continue kneading the dough by hand – for 20 minutes.
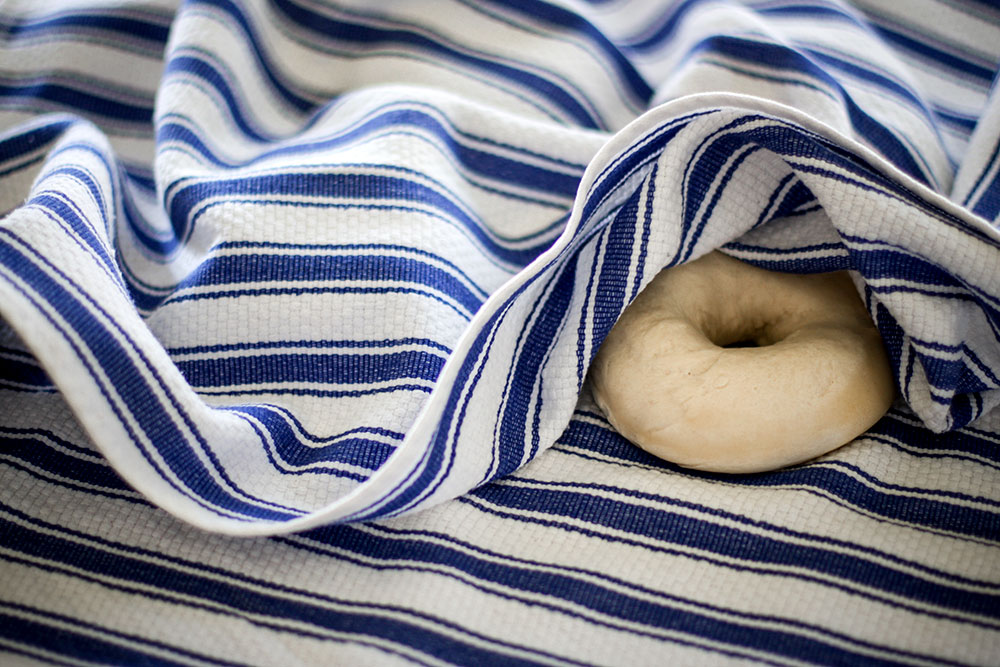
After that tiresome 20 minutes, my dough finally passed the windowpane test (you’ll read more about this later). Then, I put my bagels into sleep. Look how innocent they are when they’re sleeping:
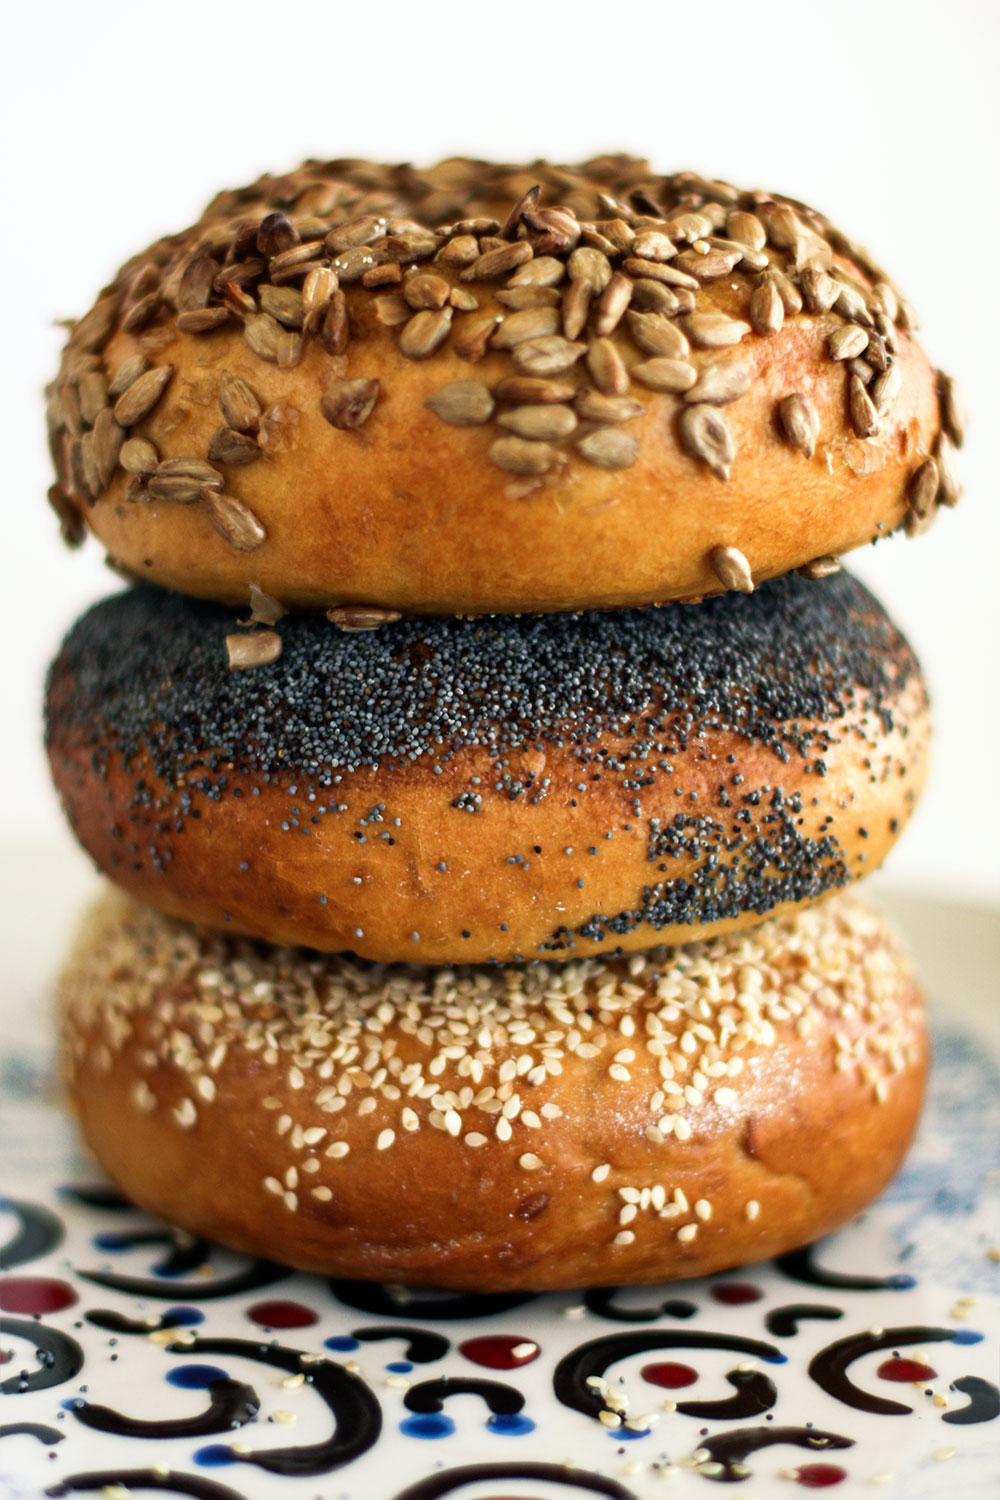
The bagels turned out so amazing that I now consider them one of my greatest baking accomplishments. There is definitely something magical about baking bread.

Plate by Turkish artist Mustafa Pilevneli.
BAGELS
recipe from “The Bread Baker’s Apprentice” by Peter Reinhart
Ingredients
Makes 12 large or 24 mini bagels
Sponge:
- 1 teaspoon instant yeast
- 4 cups unbleached high-gluten or bread flour (I used all purpose)
- 2 1/2 cups water at room temperature
Dough:
- 1/2 teaspoon instant yeast
- 3 3/4 cups unbleached high-gluten or bread flour
- 2 3/4 teaspoons salt
- 1 tablespoon malt syrup OR honey OR brown sugar (I used brown sugar)
To Finish:
- 1 tablespoon baking soda
- Cornmeal or semolina flour for dusting the pan
- Toppings for the bagels such as sesame seeds, poppy seeds, kosher salt, dried minced garlic or onions
Method
Day 1
- To make the sponge, stir the yeast into the flour in a large mixing bowl. Add the water, whisking or stirring until it forms a smooth, sticky batter. Cover with plastic wrap and allow to rise at room temperature for two hours. It should swell to nearly double in size and collapse when the bowl is tapped on the countertop.
- To make the dough, in the same mixing bowl (or in the bowl of an electric mixer), add the additional yeast into the sponge and stir. Add 3 cups of the flour, brown sugar and the salt into the bowl and mix until all of the ingredients form a ball. You need to work in the additional 3/4 cups of flour to stiffen the dough, either while still mixing in the bowl or while kneading. The dough should be stiffer and drier than normal bread dough, but moist enough that all of the ingredients are well blended.
- Pour the dough out of the bowl onto a clean surface and knead by hand for about 10 minutes. There should be no raw flour – all the ingredients should be hydrated. The dough will be too big to fit into the 5-quart Kitchen Aid mixer, so I strongly advise you do this by hand. If you’ve used all-purpose flour like I did, kneading time goes up to 30 minutes.
- The Windowpane Test: At this point, your dough needs to pass the windowpane test, which is a reliable method to determine when gluten development is sufficient (also called membrane test). The test is performed by cutting off a small piece of dough from the larger batch and gently stretching, pulling, and turning it to see if it will hold a paper-thin, translucent membrane. If the dough falls apart before it makes this windowpane, continue mixing for another minute or two and test it again. The finished dough should feel satiny and pliable but not be tacky. If it seems too dry and rips, add a few drops of water and continue kneading. If it seems tacky or sticky, add more flour to achieve the stiffness required.
- Immediately after kneading, split the dough into 12 small pieces around 4 1/2 ounces each. Roll each piece into a ball and set it aside. When you have all 12 pieces made, cover them with a damp towel and let them rest for 20 minutes.
- To shape the bagels, poke a hole in a ball of bagel dough, gently rotate your thumb around the inside of the hole to widen it to approximately two and a half inches in diameter. The dough should be as evenly stretched as possible.
- Place the shaped bagels on a lightly oiled sheet pan, with an inch or so of space between one another (use two pans, if you need to). If you have parchment paper, line the sheet pan with parchment and spray it lightly with oil before placing the bagels on the pan. Cover the pan with plastic and allow the dough to rise for about 20 minutes.
- The suggested method of testing whether the bagels are ready to retard is by dropping one of them into a bowl of cool water. If the bagel floats back up to the surface in under ten seconds it is ready to retard. If not, it needs to rise more. If it floats, it means you passed this test, too! Place the bagels in the refrigerator (covered in plastic) and retard overnight. If the bagel does not float, return it to the pan and continue to proof the dough at room temperature, checking back every 10 to 20 minutes until a tester floats.
Day 2
- The following day, preheat the oven to 500F with two racks set in the middle of oven.
- Bring a large pot of water to a boil. Add one tablespoon of baking soda to the pot to alkalize the water. When the pot is boiling, drop a few of the bagels into the pot one at a time and let them boil for a minute (two minutes if you like your bagel extra chewy).
- Use a large, slotted spoon or spatula to gently flip them over and boil them on the other side.
- Before removing the bagels from the pot, sprinkle cornmeal onto the sheet pan. Remove them one at a time, set them back onto the sheet pan, and sprinkle your topping them right away, while they are still slightly moist.
- Repeat this process until all of the bagels have been boiled and topped.
- Place the sheet pan into the preheated oven and bake for 5 minutes, rotate the pans, reduce the heat to 450 degrees, and bake for another 5-10 minutes (depending on how dark you like your bagel) until the bagels begin to brown . Remove the pan from the oven and let cool.
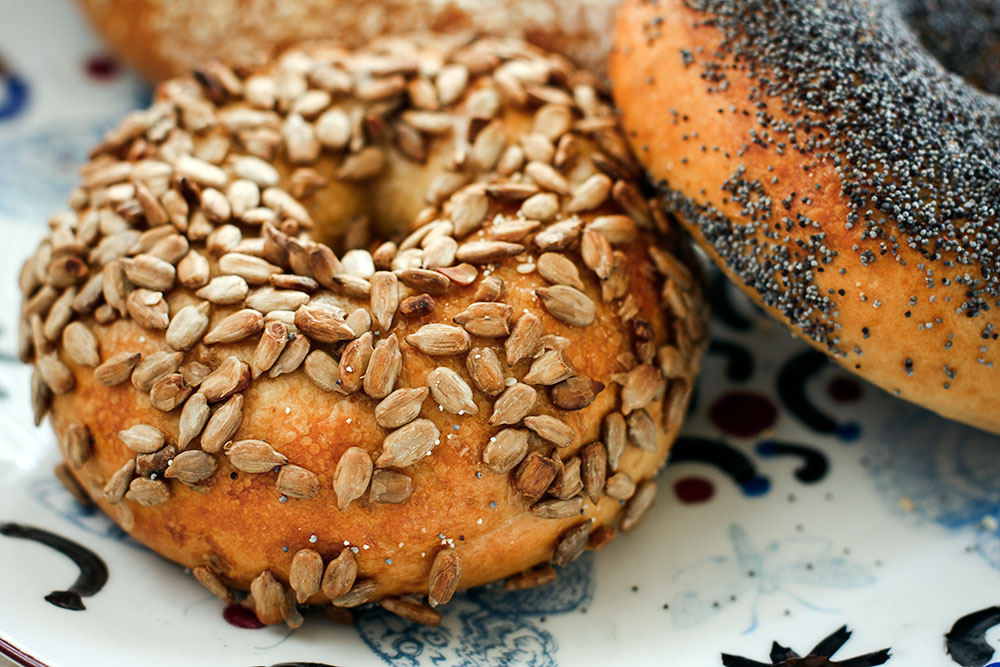




Those bagels look perfect, wow!
Wow! Those bagels are beautiful. I think I know a bit of what you mean. I lived in Deutschland for 6 years growing up and I still get these memories of the way things there smelled or felt and being able to go certain places and do certain things that just aren’t here. I miss it (dreadfully sometimes) even though I missed being in the US (at least equally dreadfully) while I was there. Craziness. Maybe a trip back would be in order for the both of us?
Besides gorgeous looking photos and a great recipe, maybe I should give yours a try…nice writing style as well btw…
Hi! I miss Blueberry Bagels. Got a recipe for that?
perfect-looking! i need to learn how to make bagels; even in my neighborhood in jersey, the bagels are going downhill – big, soft baseballs.
Ha, I happen to have some bagels waiting for their float test as I write this! I too am making Reinhart’s recipe. Glad I decided to reduce the batch size, as I wouldn’t want to fry my kitchenaid either.
Anyway, your bagels look marvelous, I hope mine turn out almost as well!
FYI, mine turned out well (no photos, no time) even though they never did pass the float test. A little flat perhaps, but very flavorful.
Hi,
Very nice recipe blog. I just added it to this recipe directory.
Your readers and fans can vote for you by giving you a star. See you around! 🙂
No wonder you’re proud of them – they look terrific!
Is it a sopa opera? 1st day, second day.
So from now on, I will eat the bagels more careful. Maybe in two days…
They look delicicious especially the one with poppy seeds
YUM! i am visiting a friend in istanbul in 2 weeks, and i think i might just make bagels for her when i am there. she is a new yorker and will be so excited to have that familiar taste!
Those are some exceptional looking bagels and I think that you can safely say that you’ve come full-circle (and no pun is intended) 🙂
Bagels are my all time favourite. they look delicious. thanks for sharing.
Beautifully done, Cenk! I too miss San Francisco although I never lived there. Here’s hoping you get to have a bagel there again soon!
Try watching “Eli Stone” on ABC Thursdays as well. It’s about an attorney of law, who is some kind of a modern day prophet living in San Francisco. God, I missed California soo much..
Though I’ve never been a bagel-fan, these seem really tasty. Hope to have a picnic along the Bakers Beach one day..
Brilynn, Khun Ying, aforkfullofspaghetti, Ivonne, Anjali J – Many thanks!!
Amanda – I hear you… I desperately need a break and it better be in SF!
Divaliscious – Thanks! Hope you like the recipe.
Sherxr – Let me check out the book again and see if there are any variations to this recipe that would turn them into blueberry bagels.
michelle – These bagels are just the opposite of that. Hope you try the recipe.
Astrid – I think the float test is performed so that the bagels don’t turn out flat. Hope you have better luck next time.
Gizem – Ha! That’s funny.. Actually that is the case with most yeasted goods. The wait kills you!
Shara – And maybe she can treat you with a simit in return?
Cynthia – Thanks! 🙂
Çağdaş – I have a hard time believing you are not a fan of anything edible… I, too am an Eli Stone addict! And you know that I’m so in for that picnic.
hi just want to say your pictures are amazing!!!! i always look forward to your next entry. Been reading this blog for quite some time now. your entries rock!
Those look so great, I bet they were fun to make too!
Have you ever had a New York bagel? They’re denser and flavorful, supposedly something in the water. Of course, everyone has their own bagel loyalties. Now that I’m half way around the world I get homesick for bagels too, dense NYC bagels with lox and cream cheese.
You can be proud indeed! They turned out perfect! Very impressive!
I’m curious to know if anyone has tried these with the dough attachment on a Cuisinart food processor… I’m trying to avoid kneading by hand!
Hi!!! I have just discovered this site and i love it and these bagels look just delicious!!!!
Cenk I just find out your blog by SF Chronicle and stucked into your blog. I am urgently adding your website to my bookmarks. Excellent job!!! Very esthetic photography and your recipies fells right. I miss the real Bagel taste sooo much with crunchy looking yours seems perfect! I am feeling homesick too and recently dreaming the california burritos with extra cheese and guacamole.
Thanks for sharing.
I love bagels and I’ve never tried to make them…
This is a great moment!
🙂
Yours look marvelous!
Hi! I tried your recipe and it turned out to be really delicious. I didn’t use malt syrup. Since i’m not an experienced baker, may i pose a few questions:
1. Why the dough needs to be retarded overnight in the fridge?
2. I tried boiling the dough straight after retarding overnight and it becomes flat bagel because the dough was very expanded. So I tried kneading and forming the dough after retarding and the result came much better. Do you think forming the dough after retarding a good idea?
3. My husband complimented the appearance of the bagel, but he complains that it still didn’t taste like new york bagel. He said the interior is not as dense and chewy as the new york ones. What do you think the workaround of this? How to make the interior denser and more chewy? I tried boiling for a bit long period. Should i also reduce the yeast amount, and should i use malt syrup instead of brown sugar/honey?
thank you!
Ragamuffin girl – Thank you! Glad to hear my posts are addictive!
Hillary – It was fun! Thanks for stopping by.
AppetiteforChina – I had New York bagels before. Although different, these were quite dense too.
Tartelette – Thanks. Glad to hear you liked them.
Salvia, Deniz, Leonor – Thank you!
Rani – I am really not sure what went wrong with your retarding process… Mine turned out quite dense and chewy actually. I’ve used brown sugar and it worked fine for me. The recipe mentions longer boiling time for denser bagels. It might be a good idea to buy the book. It explains the retarding process and the reasoning behind it in greater detail.
Soooo glad i found you neighbor!
Kisses from a rainy Athens, Greece:)
Foivi
P.S.
Bagels turned out perfect!!
I have made these bagels 3 times so far. Twice with all purpose flour and once with bread flour. All three times have been delicious but I think I like the bread flour the best. Thanks for posting this!